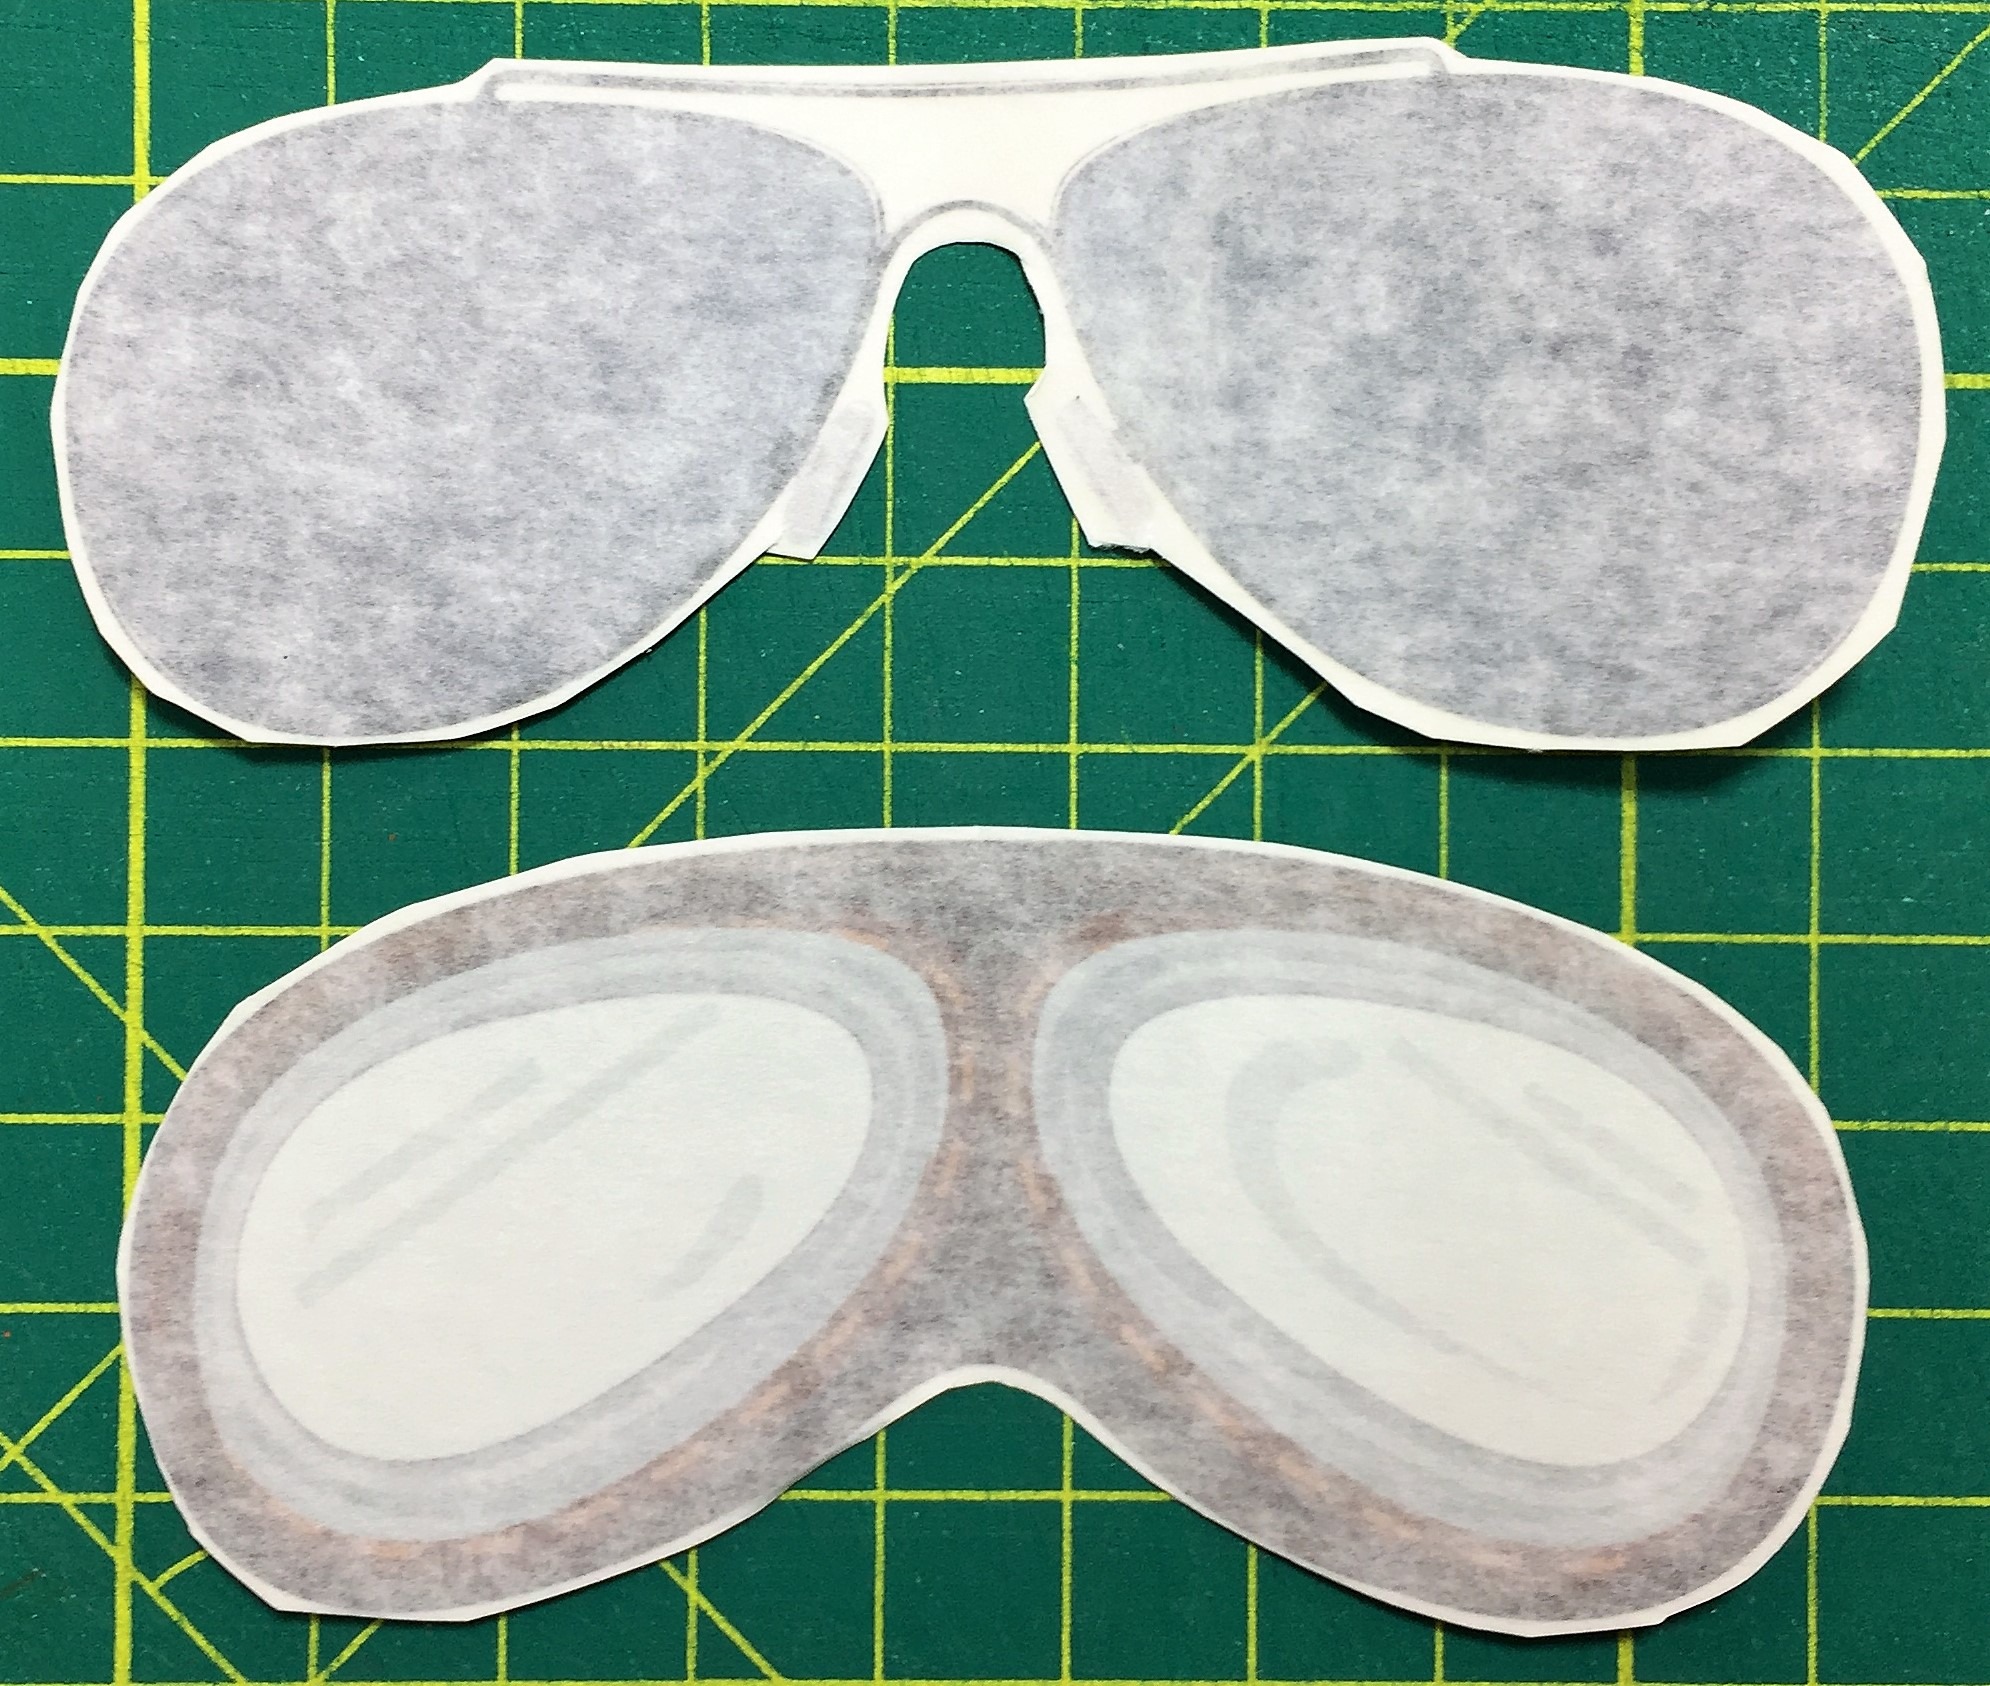
 Step 1 – cut around the goggles as closely as possibleThis page is a special subset of our full decal application instructions. Getting glasses and goggles and other large decals isn’t too hard – if you apply the decals with the correct process. This is a step by step application guide for goggles and glasses.
You can see videos of our applying larger decals on YouTube! We have examples of:
Applying a very large hollow ring
Applying a large block of text
Applying a name with an embellishment
Step 1 – Separate out and cut around the goggles or glasses as closely as you can. The transfer tape is not as flexible as the vinyl, so excess transfer tape just hinders the goggles laying flat around the edges.
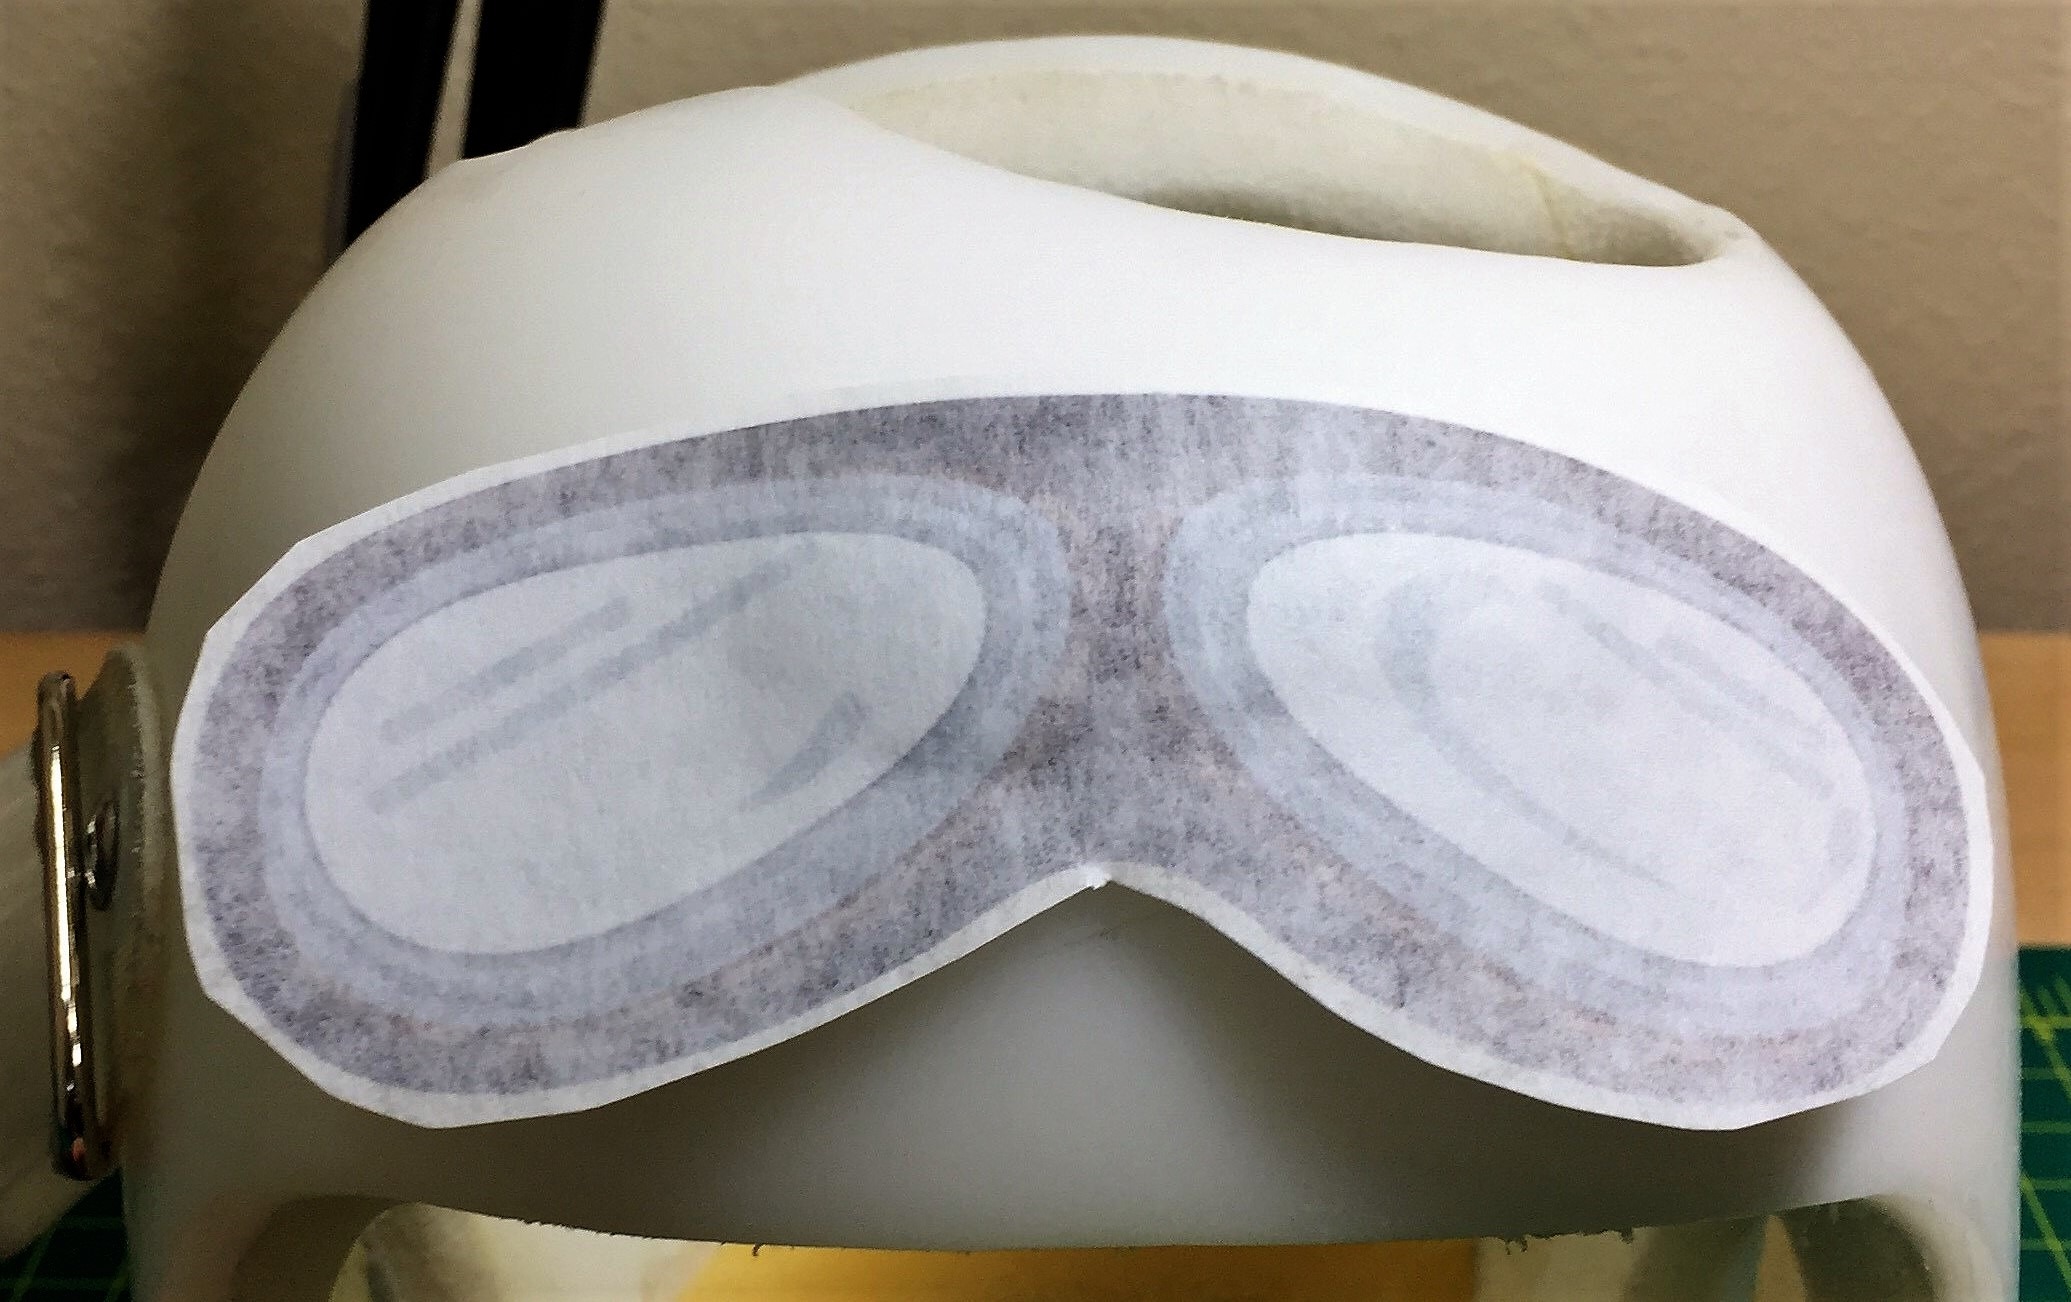 Step 2 – Stick the goggles down in the centerStep 2 – stick the goggles down in the center. You can check if the goggles are centered as you want them on the band, and lift the goggles off and stick it down again if it is off center.
Then use a squeegee, credit card or large coin to start sticking the decal down in the center.
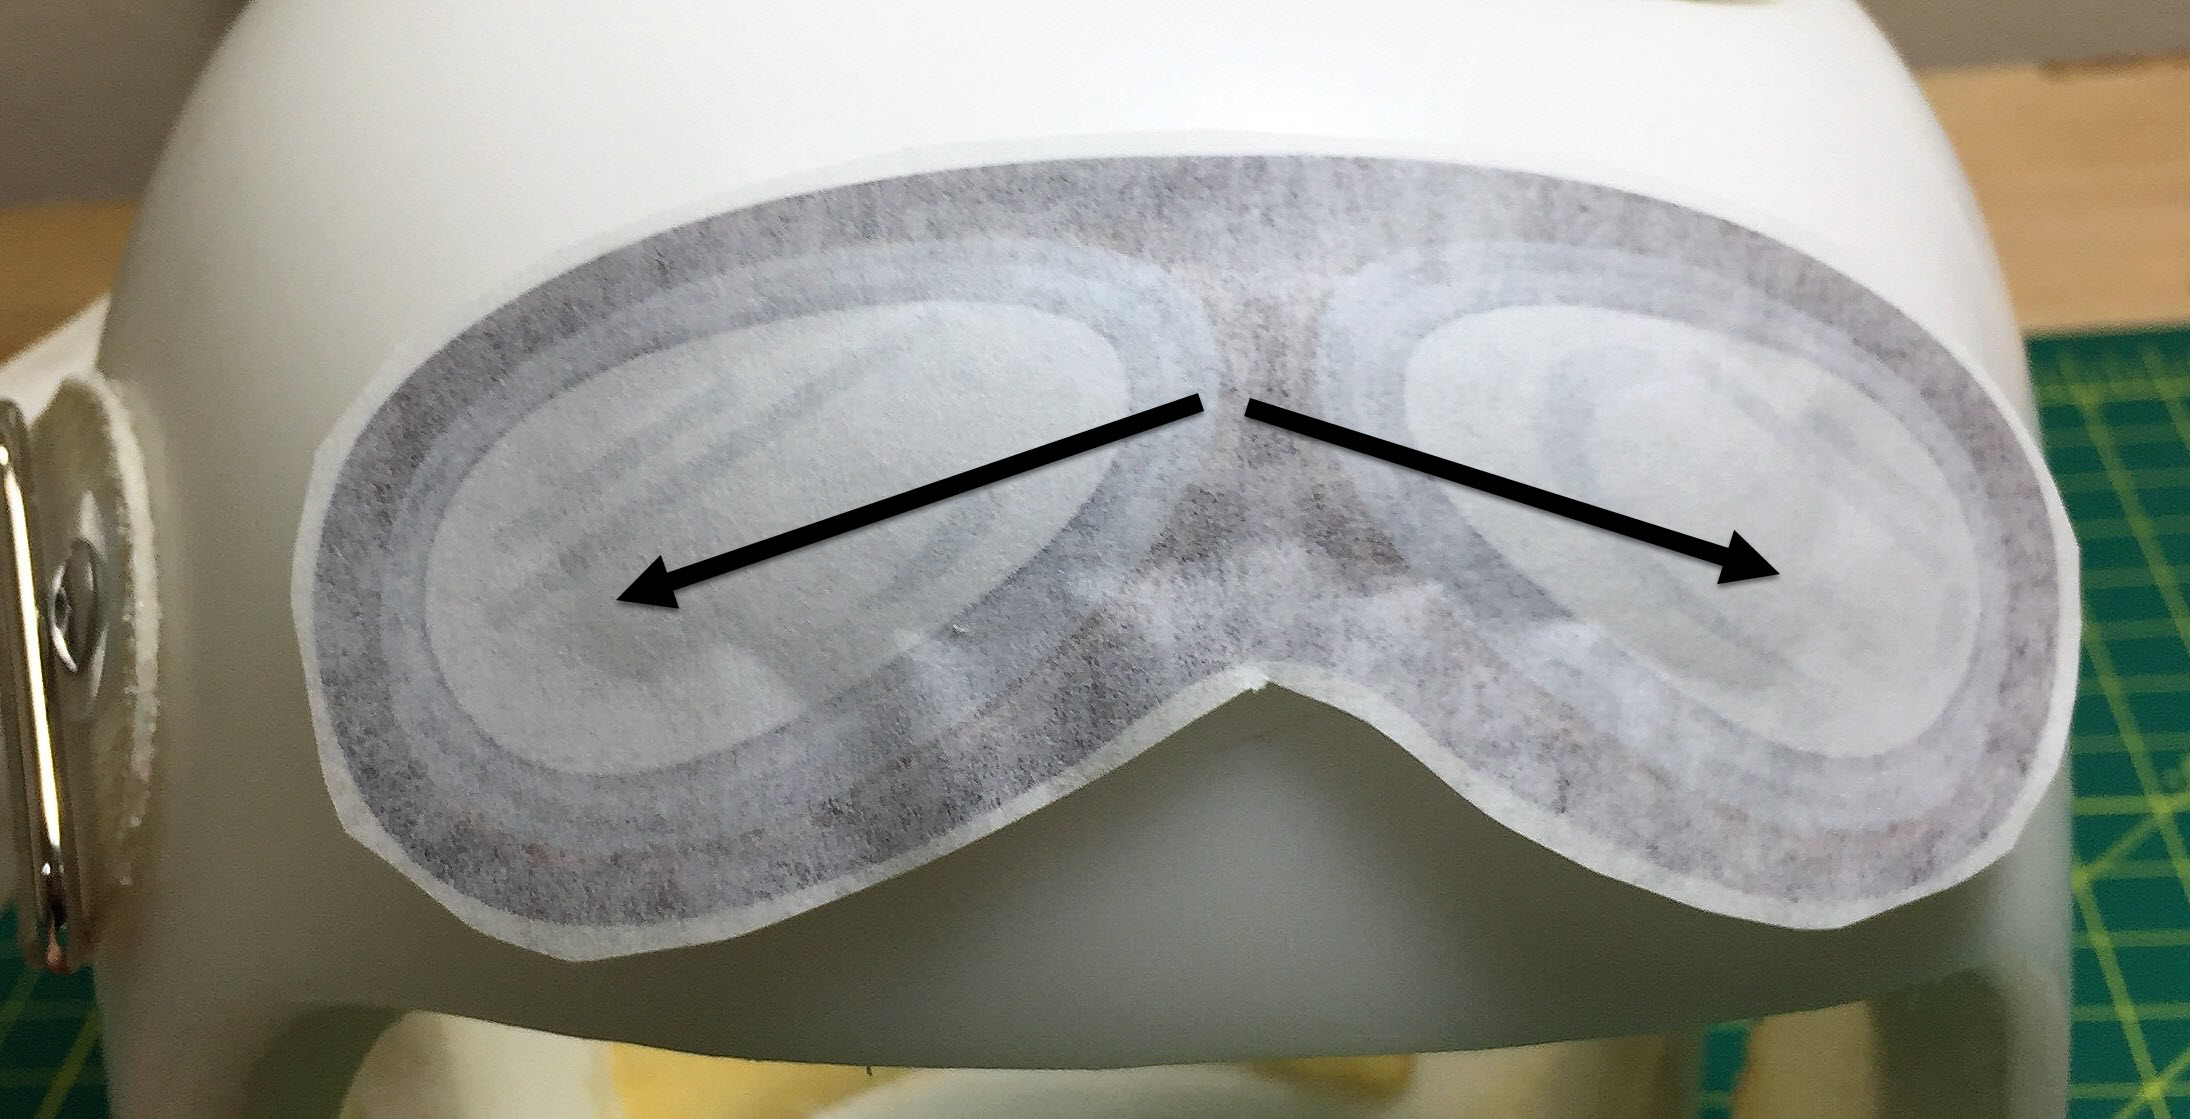 3 – Keep working out from the centerStep 3 – keep working out from the center, tacking down the goggles. Work in small, firm strokes. You can apply a lot of pressure to the vinyl.
As you get more and more of the decal down, the more you will see excess vinyl building up at the edges.
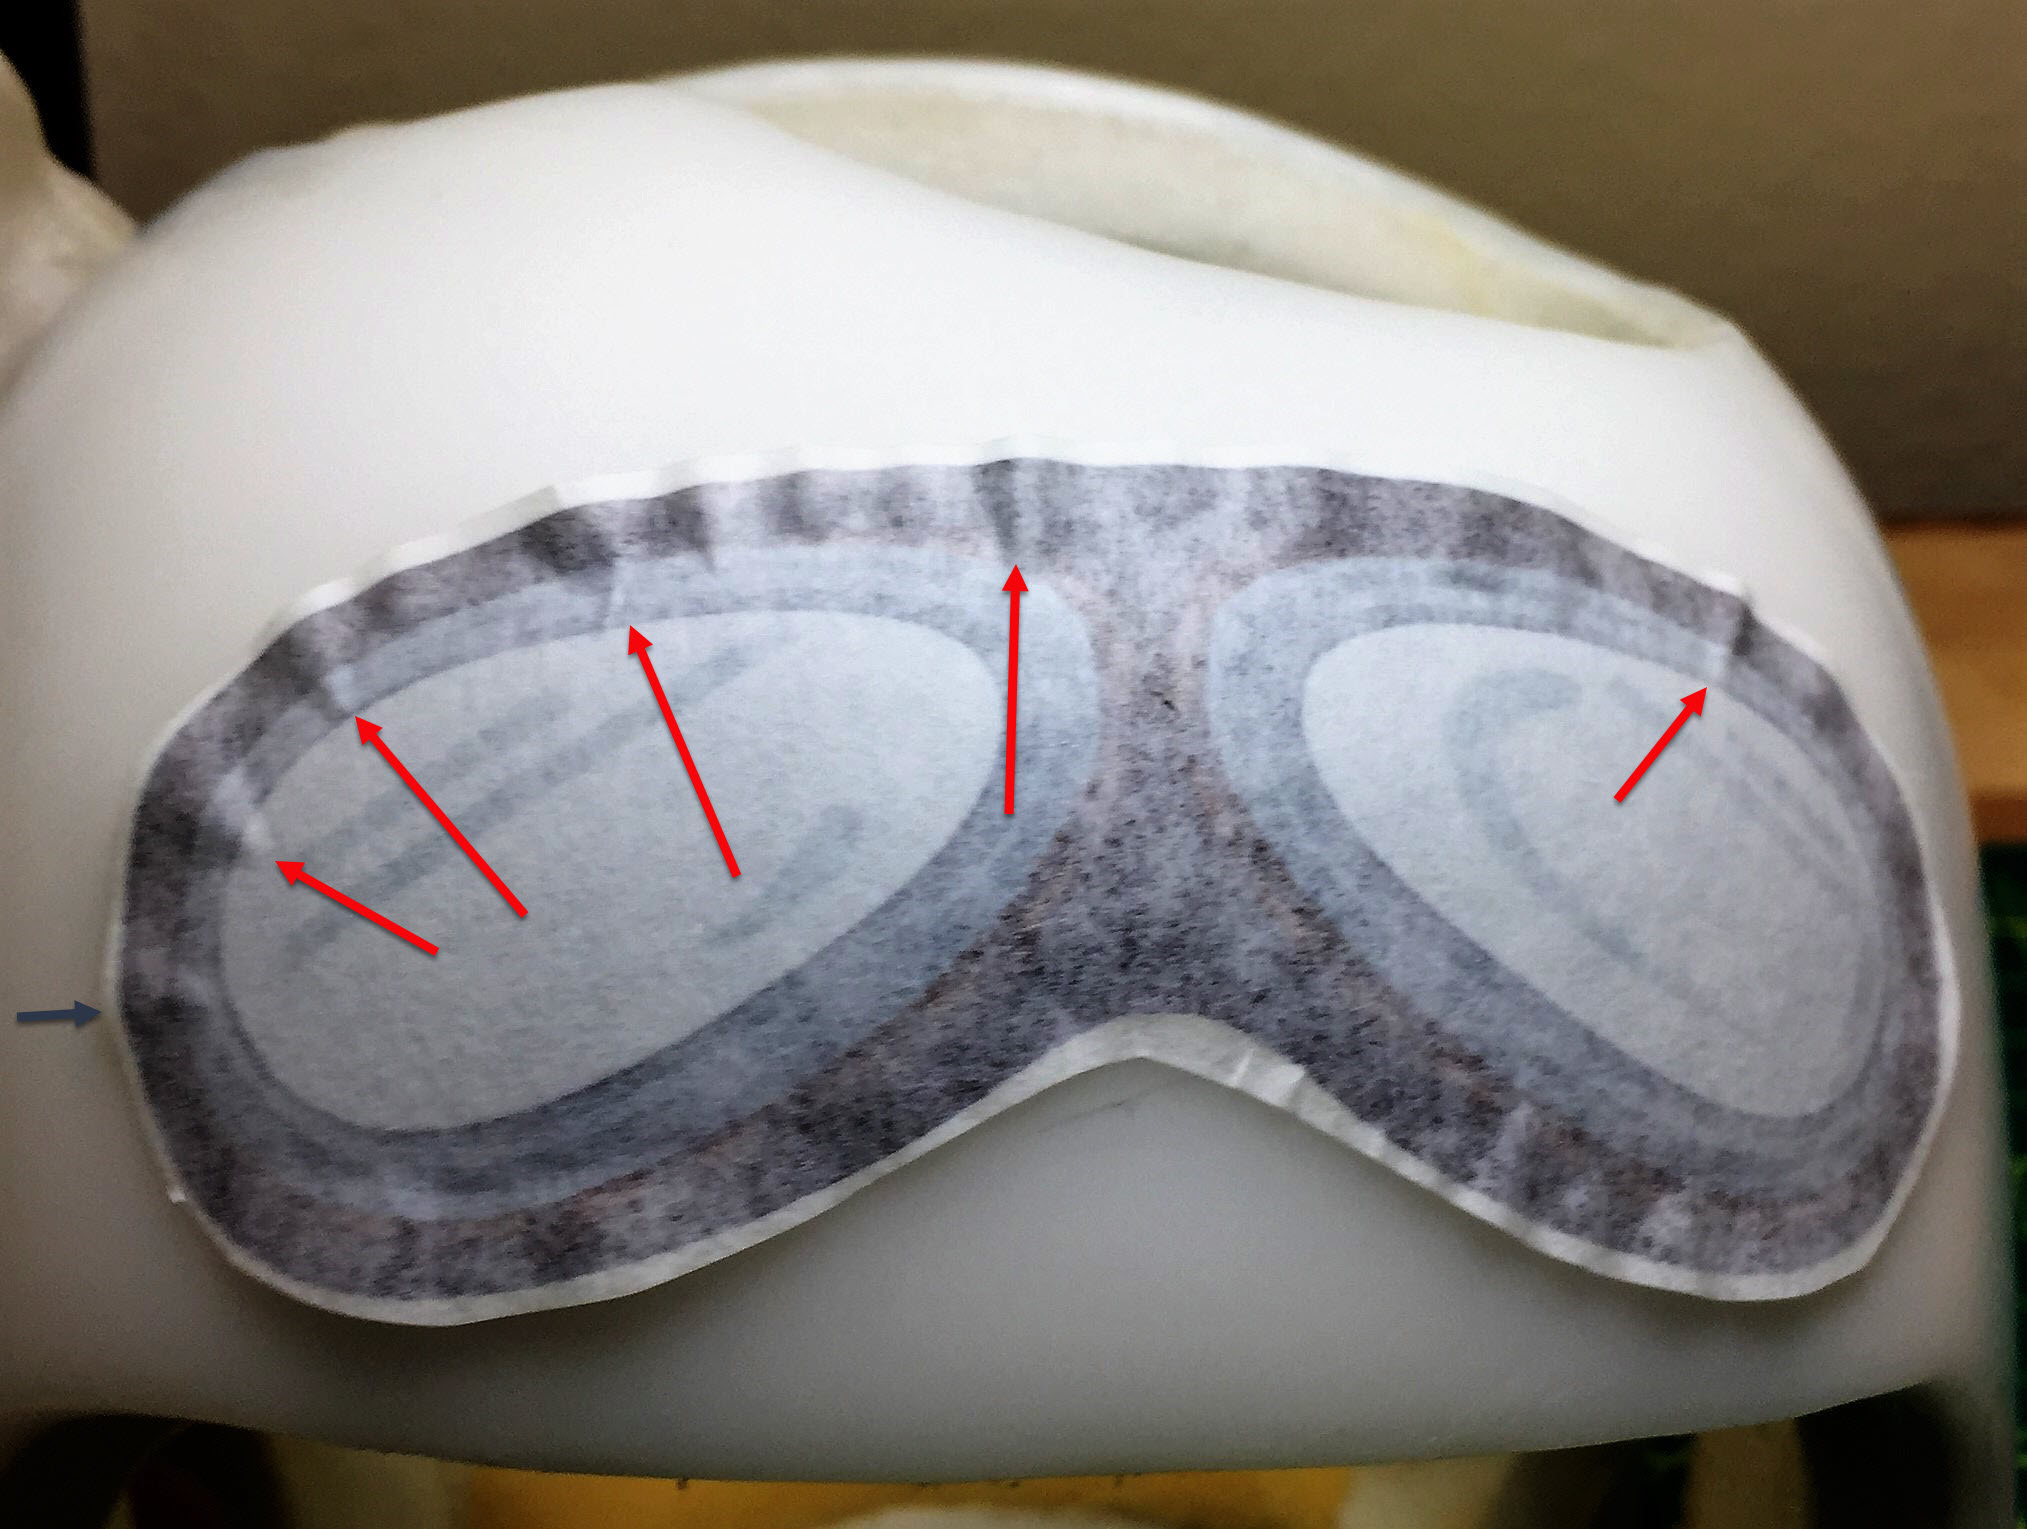 4 – Get the goggles nearly all downStep 4 – you have slowly worked from the center of the goggles to the edges, so where all but the edges is down and smooth. You worked in small strokes, a little at a time.
As you get to this point, you will see the edges looking wavy, with vinyl lifted up at the red arrows.
Take your squeegee/credit card/coin, and start at the inside and push these mountains (tip of the red arrows) down, a little at a time.
Don’t try to push one mountain flat and then move to the next one.
Instead, push a little on a mountain, and then move to the next mountain and push a little on it.
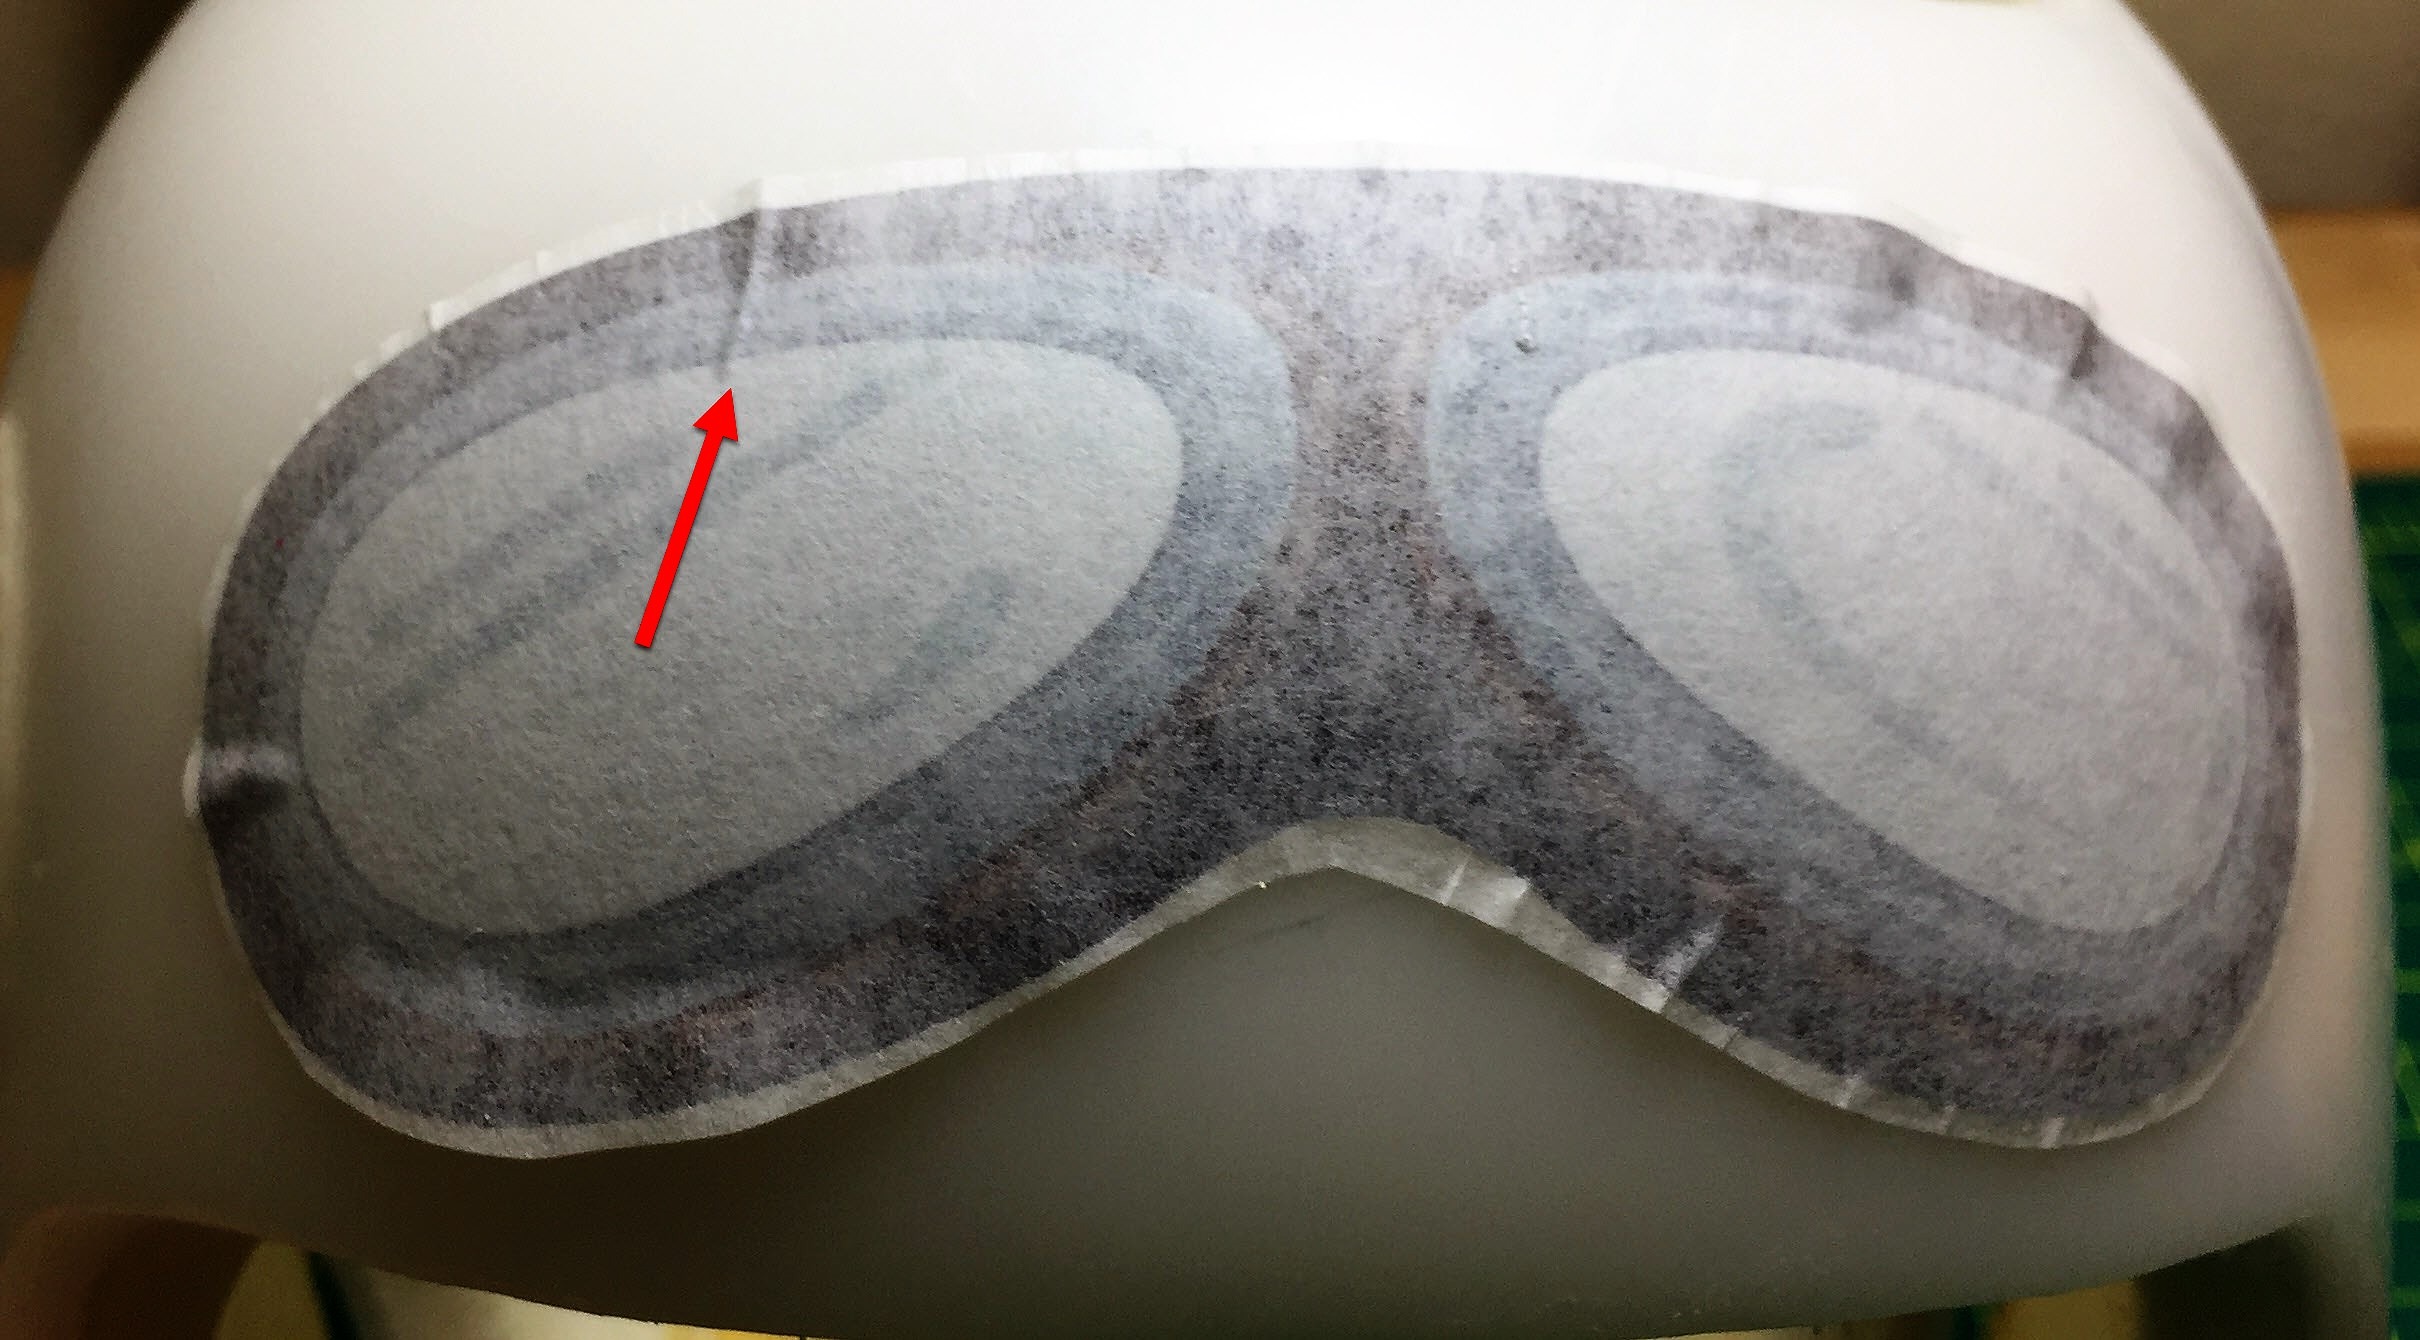 5 – Nearly all the mountains are goneStep 5 – I have worked the left side top here to where almost all the little mountains are down. The red arrow is pointing to what could turn into a crease if I don’t address it right.
To fix the crease, use the sharp corner of the squeegee to apply a lot of pressure to the start of the crease (tip of the red arrow). Apply a lot of pressure, and slowly slide from the start of the crease, to the edge of the goggles.
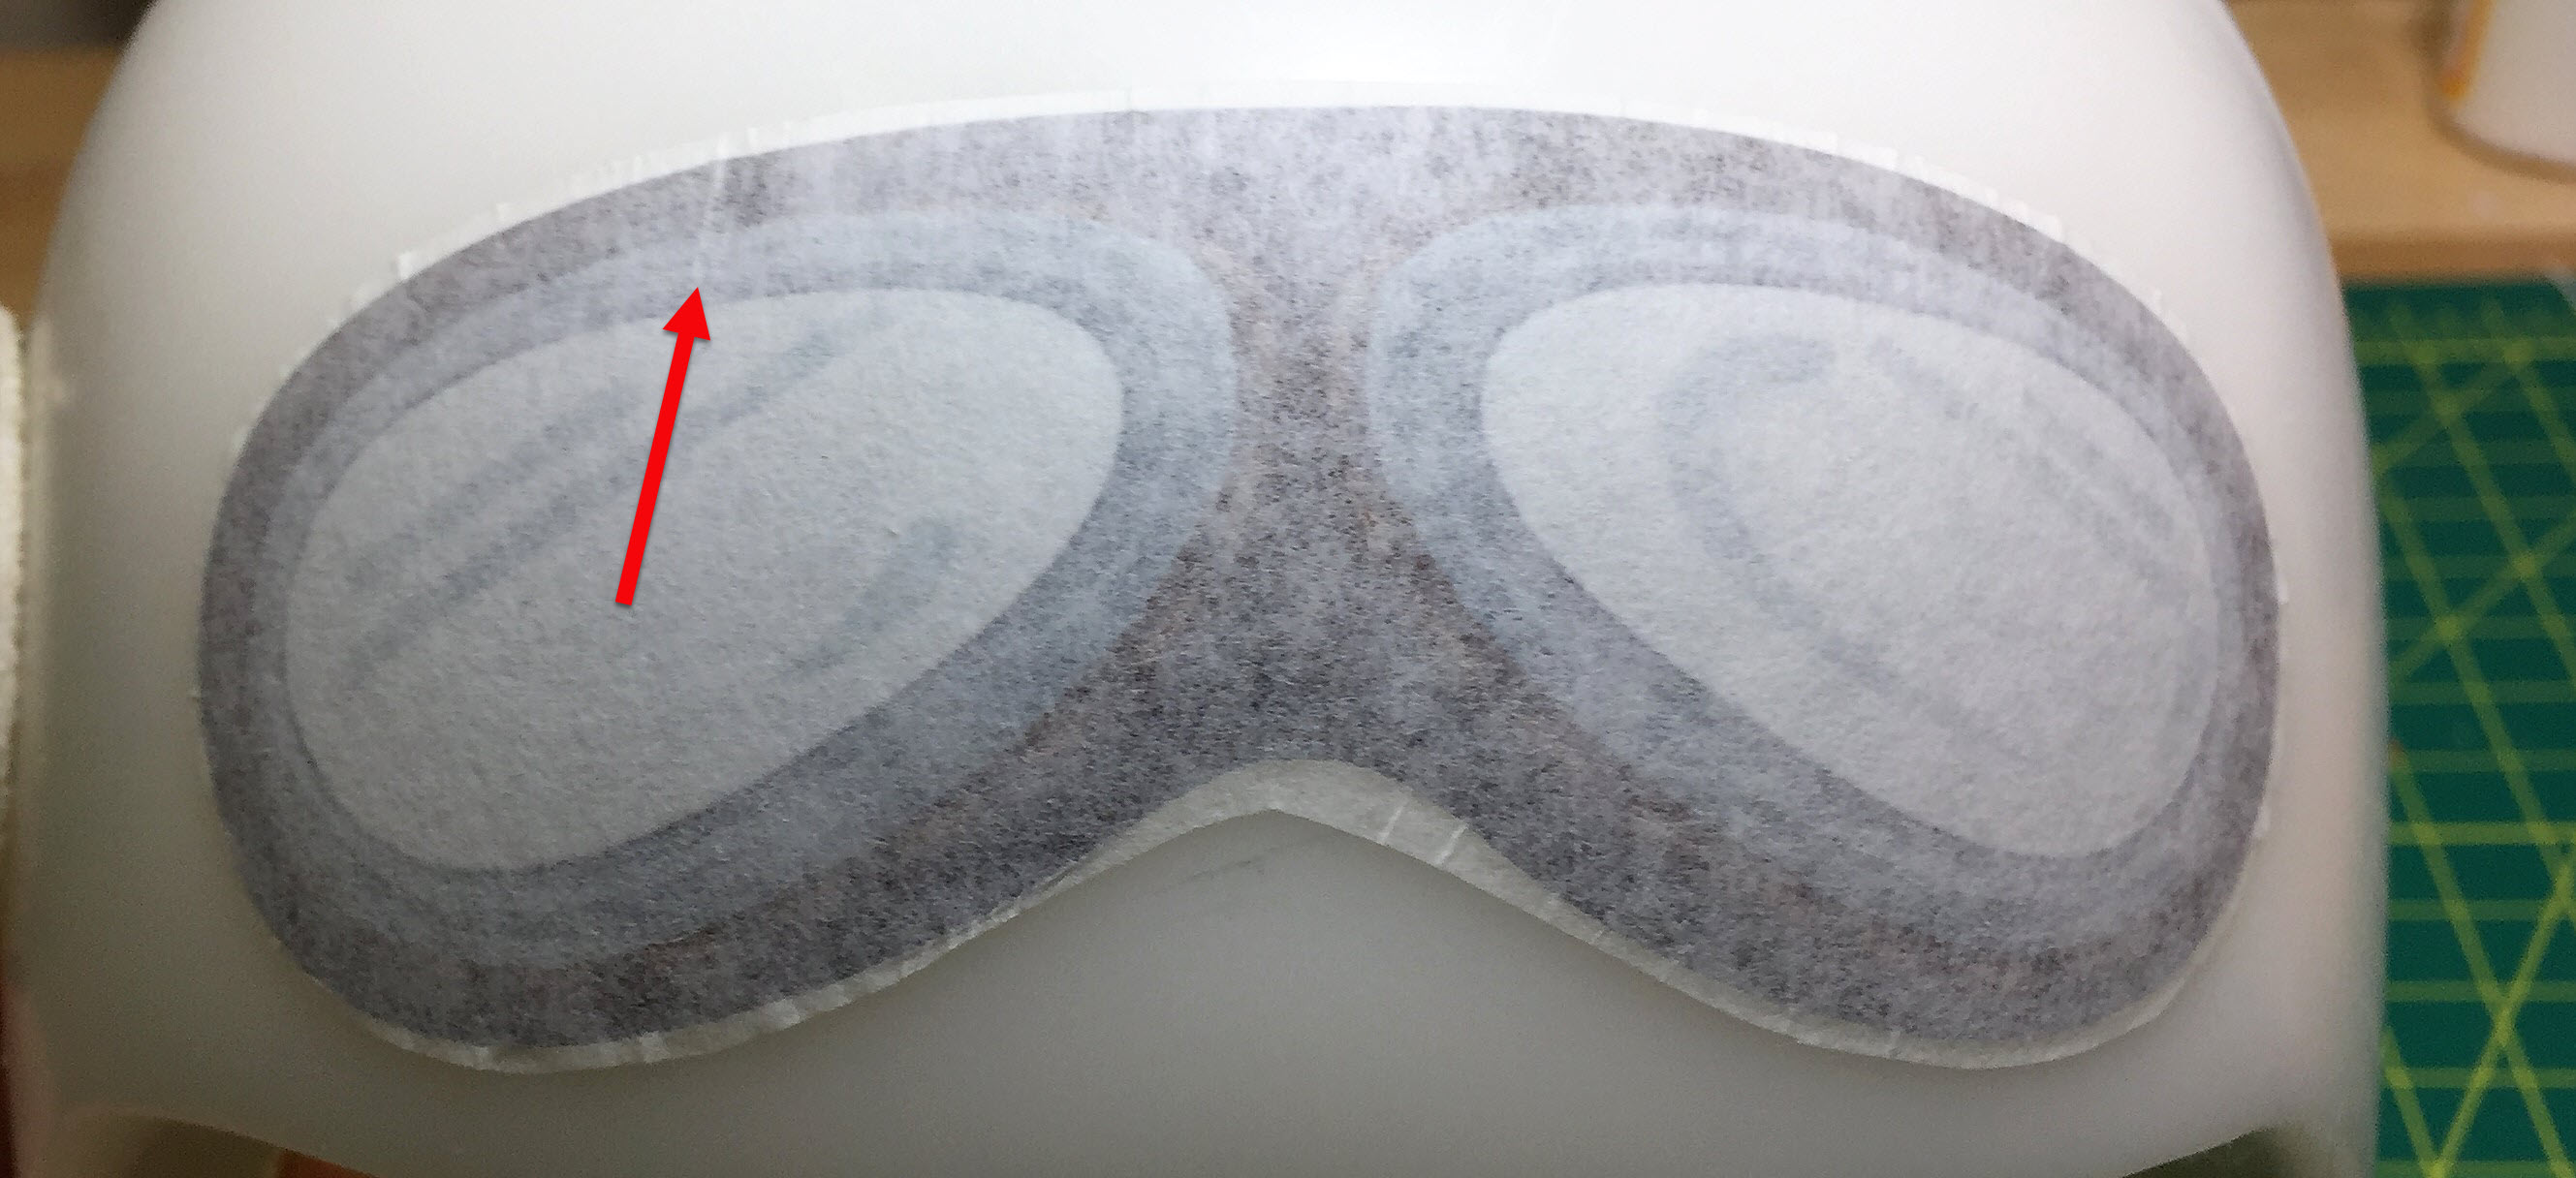 6 – All of the decal is downStep 6 – I worked all the mountains. By being aggressive at the start of a crease, I eliminated it.
This example shows why I don’t make decals beyond a certain size. Applying a flat decal to a rounded helmet works up to a 2-3 inches, but it takes more and more experience and technique to get large decals down flat.
You can go back to our full application instruction guide here.
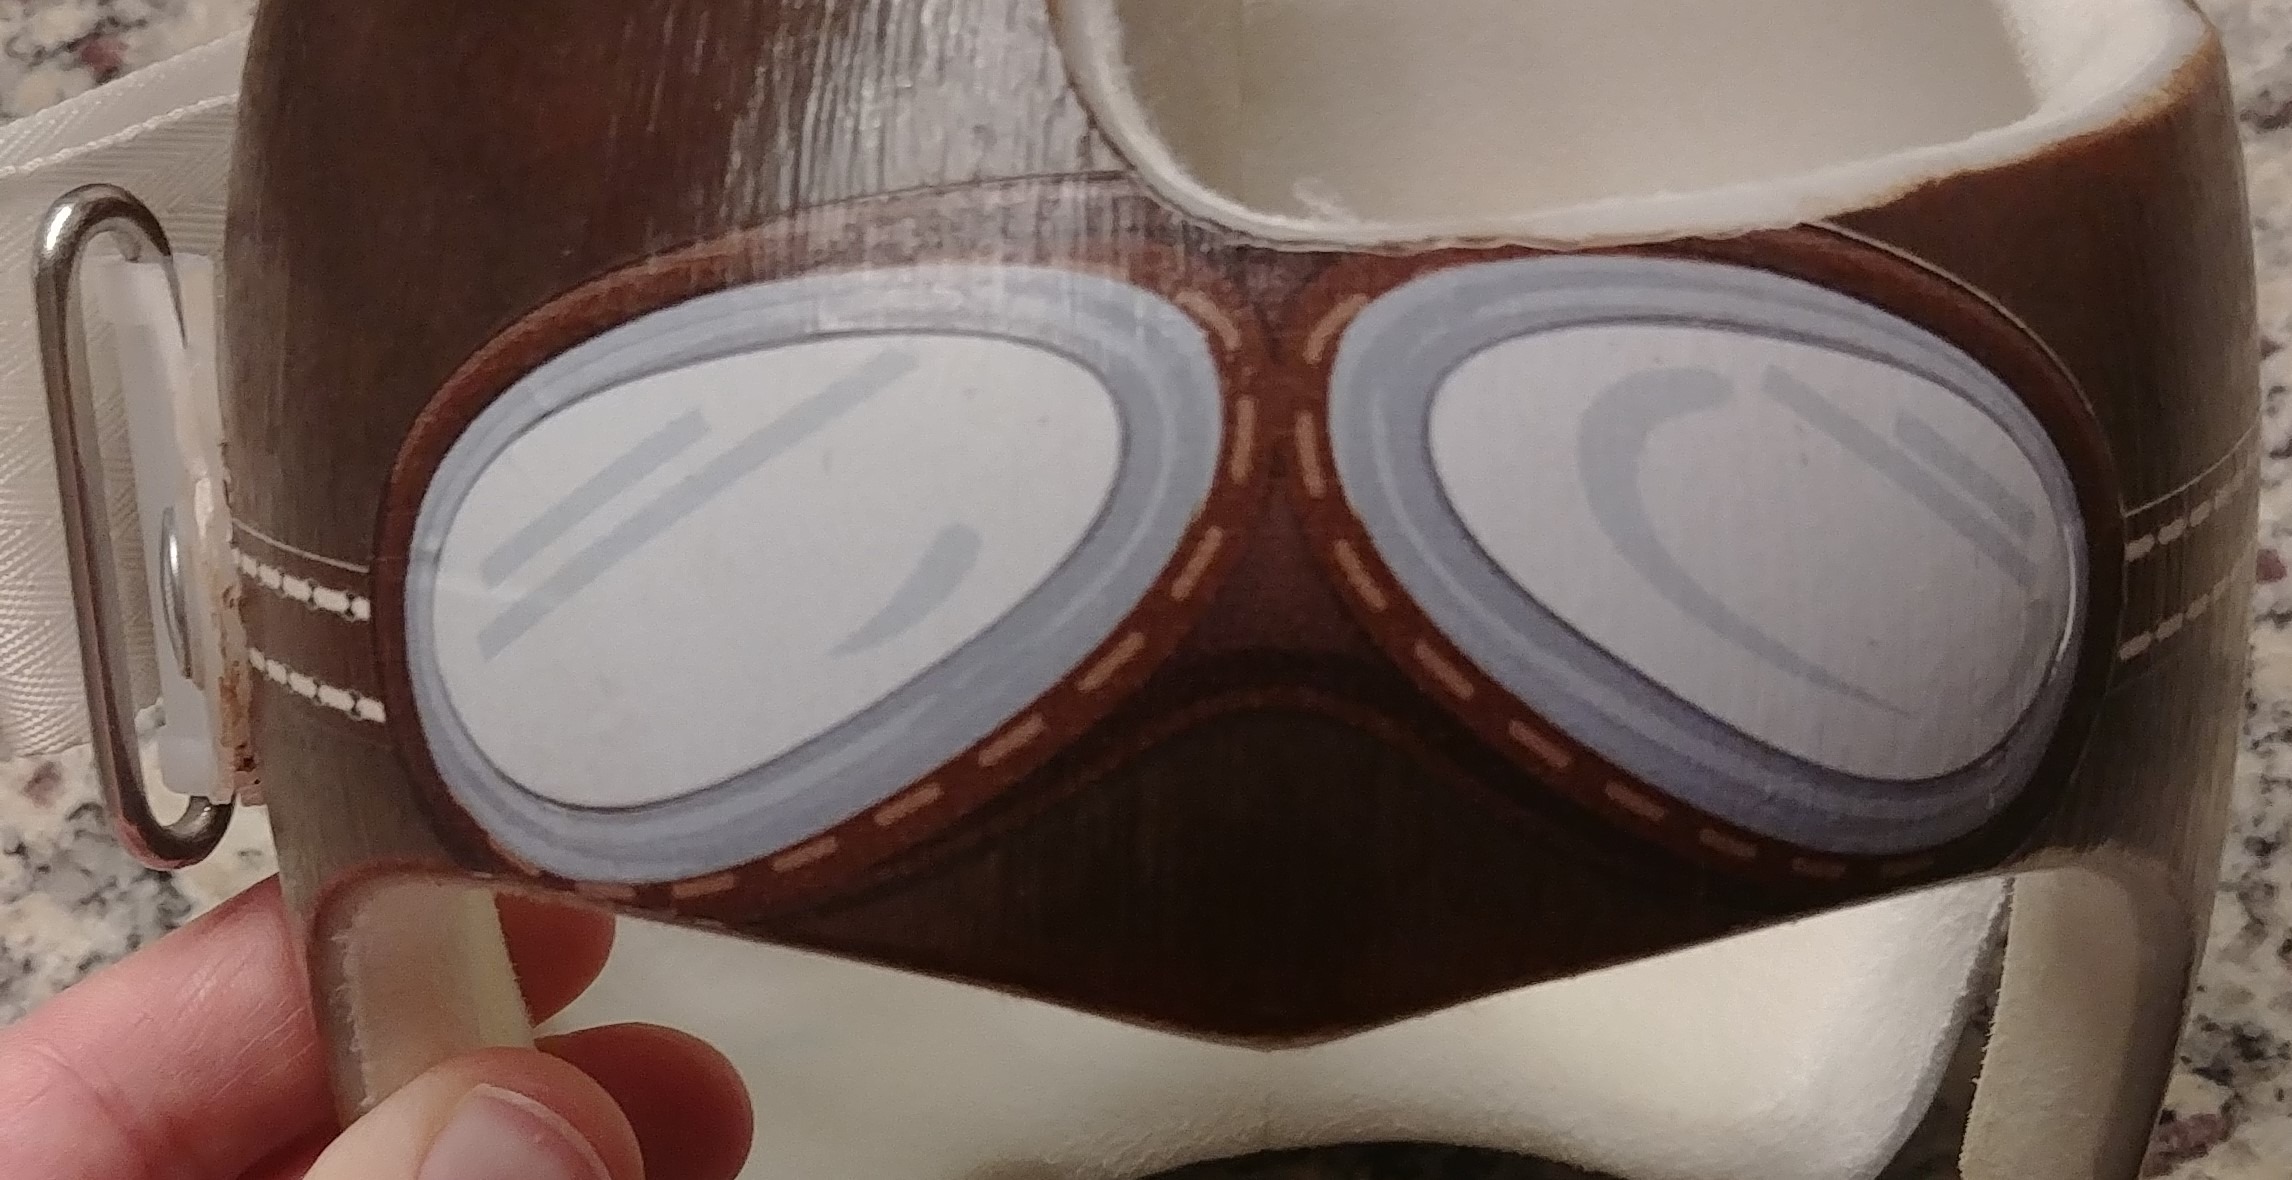 A great customer photo example of a goggles applied flat!