 We also have instructions on YouTube!
Quick Links
How to apply the vinyl decals
How to paint the cranial band
We offer matching heat transfers that you can apply to your own clothing! This guide will walk you through how to do that using an iron.
 The iron-on transfer
You can easily apply the designs to cotton clothing, but because the transfer bonds to clothing at 300 degrees Fahrenheit, you can also apply them to blends or pure polyester. However you need to be more careful not to overheat polyester during the ironing process.
Step 1 – iron your item of clothing. The design needs to be applied to flat fabric. If you are applying to new cotton clothing, it should be pre-shrunk or pre-washed by you.
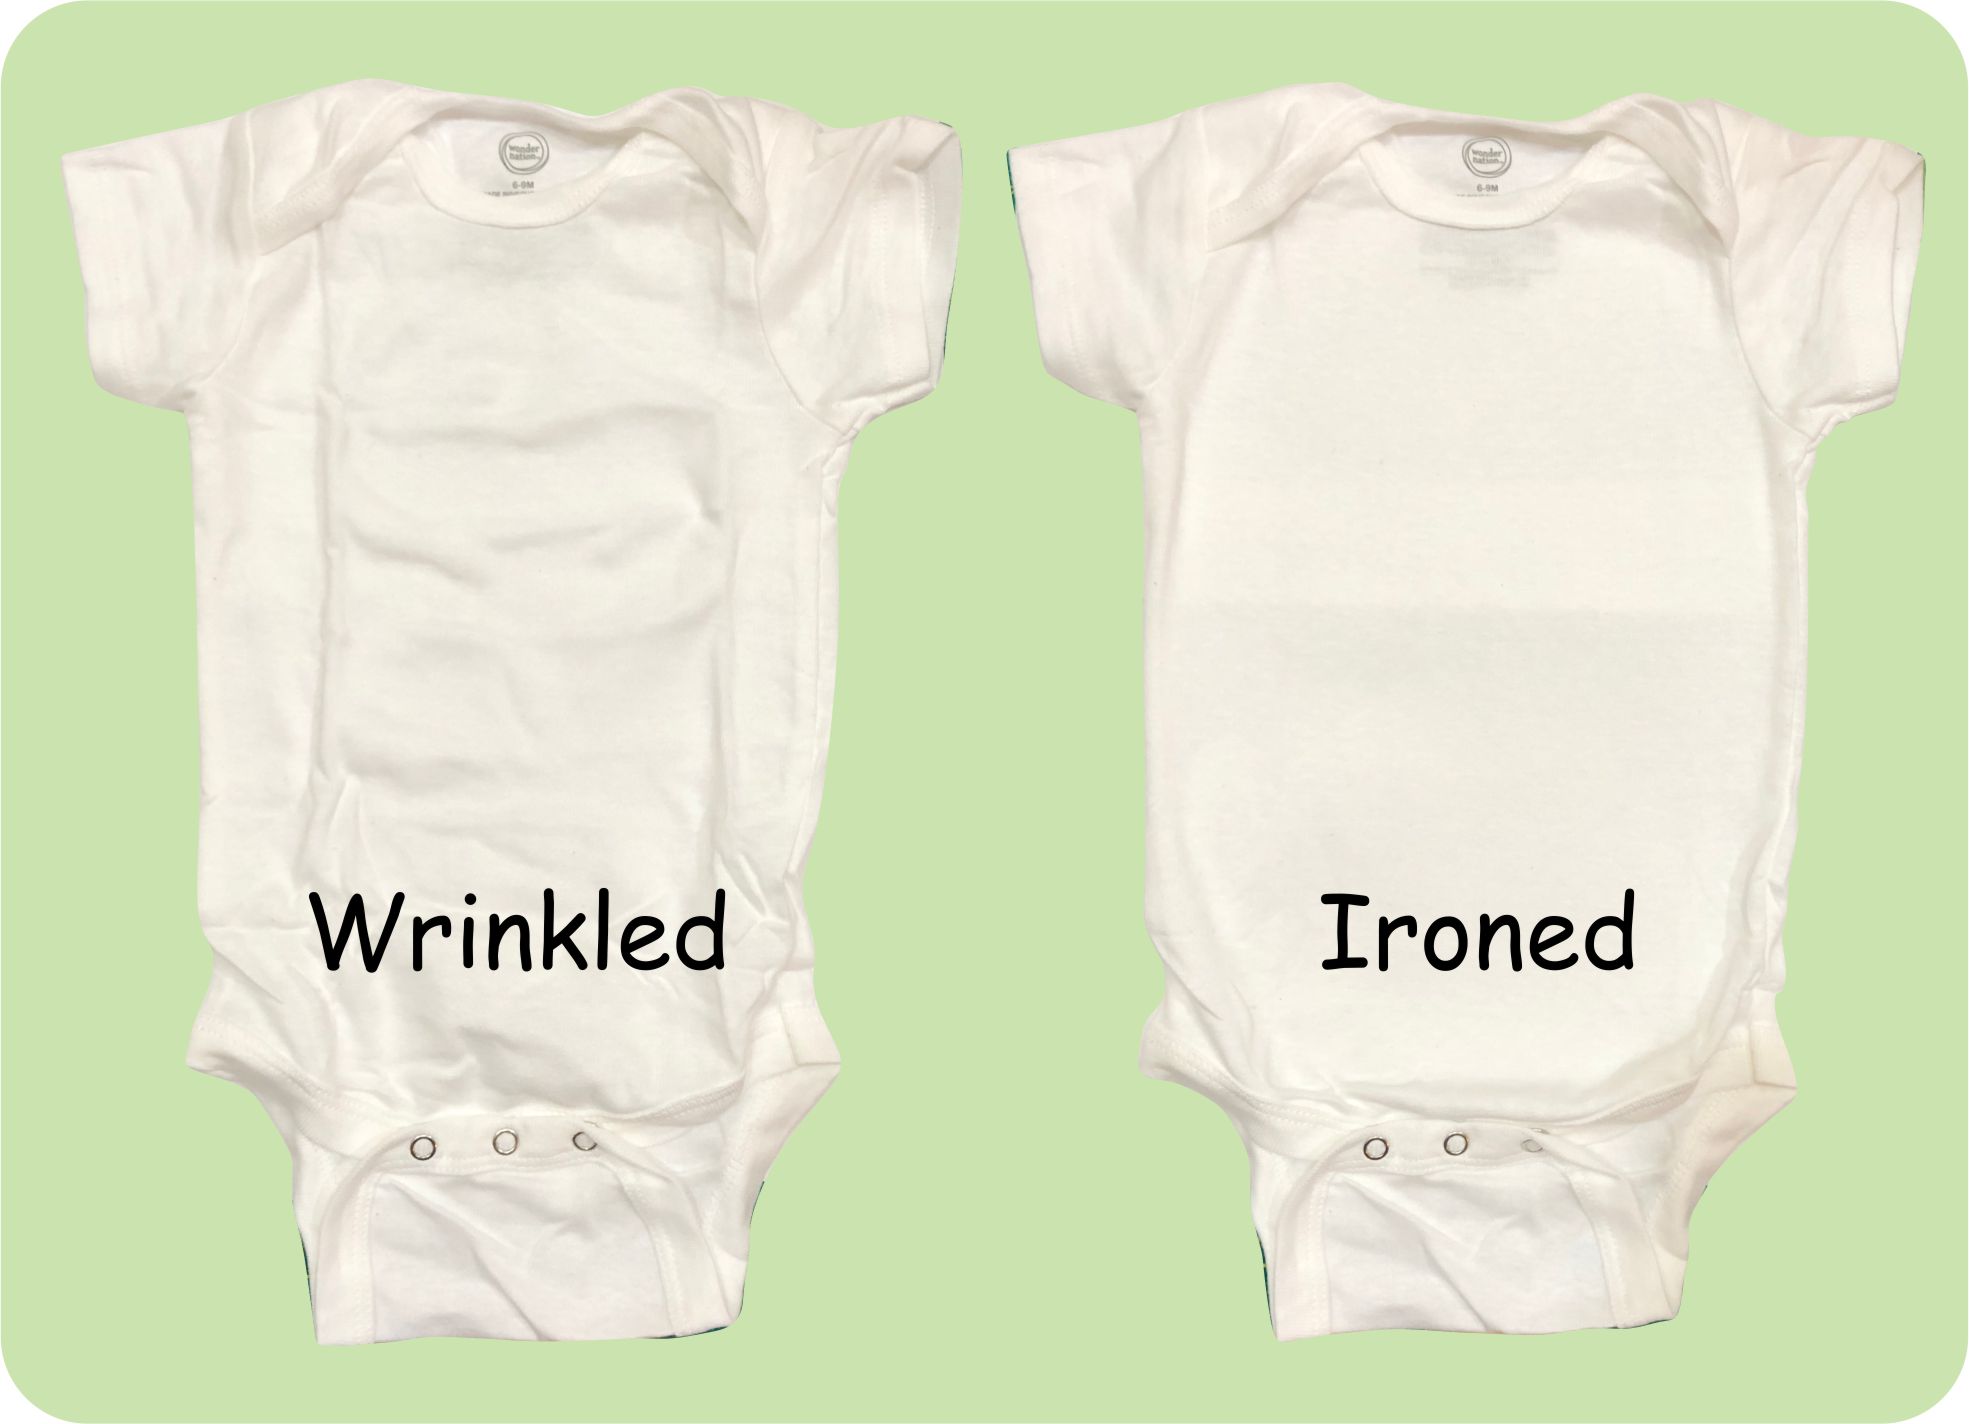 Make sure the clothing is wrinkle free
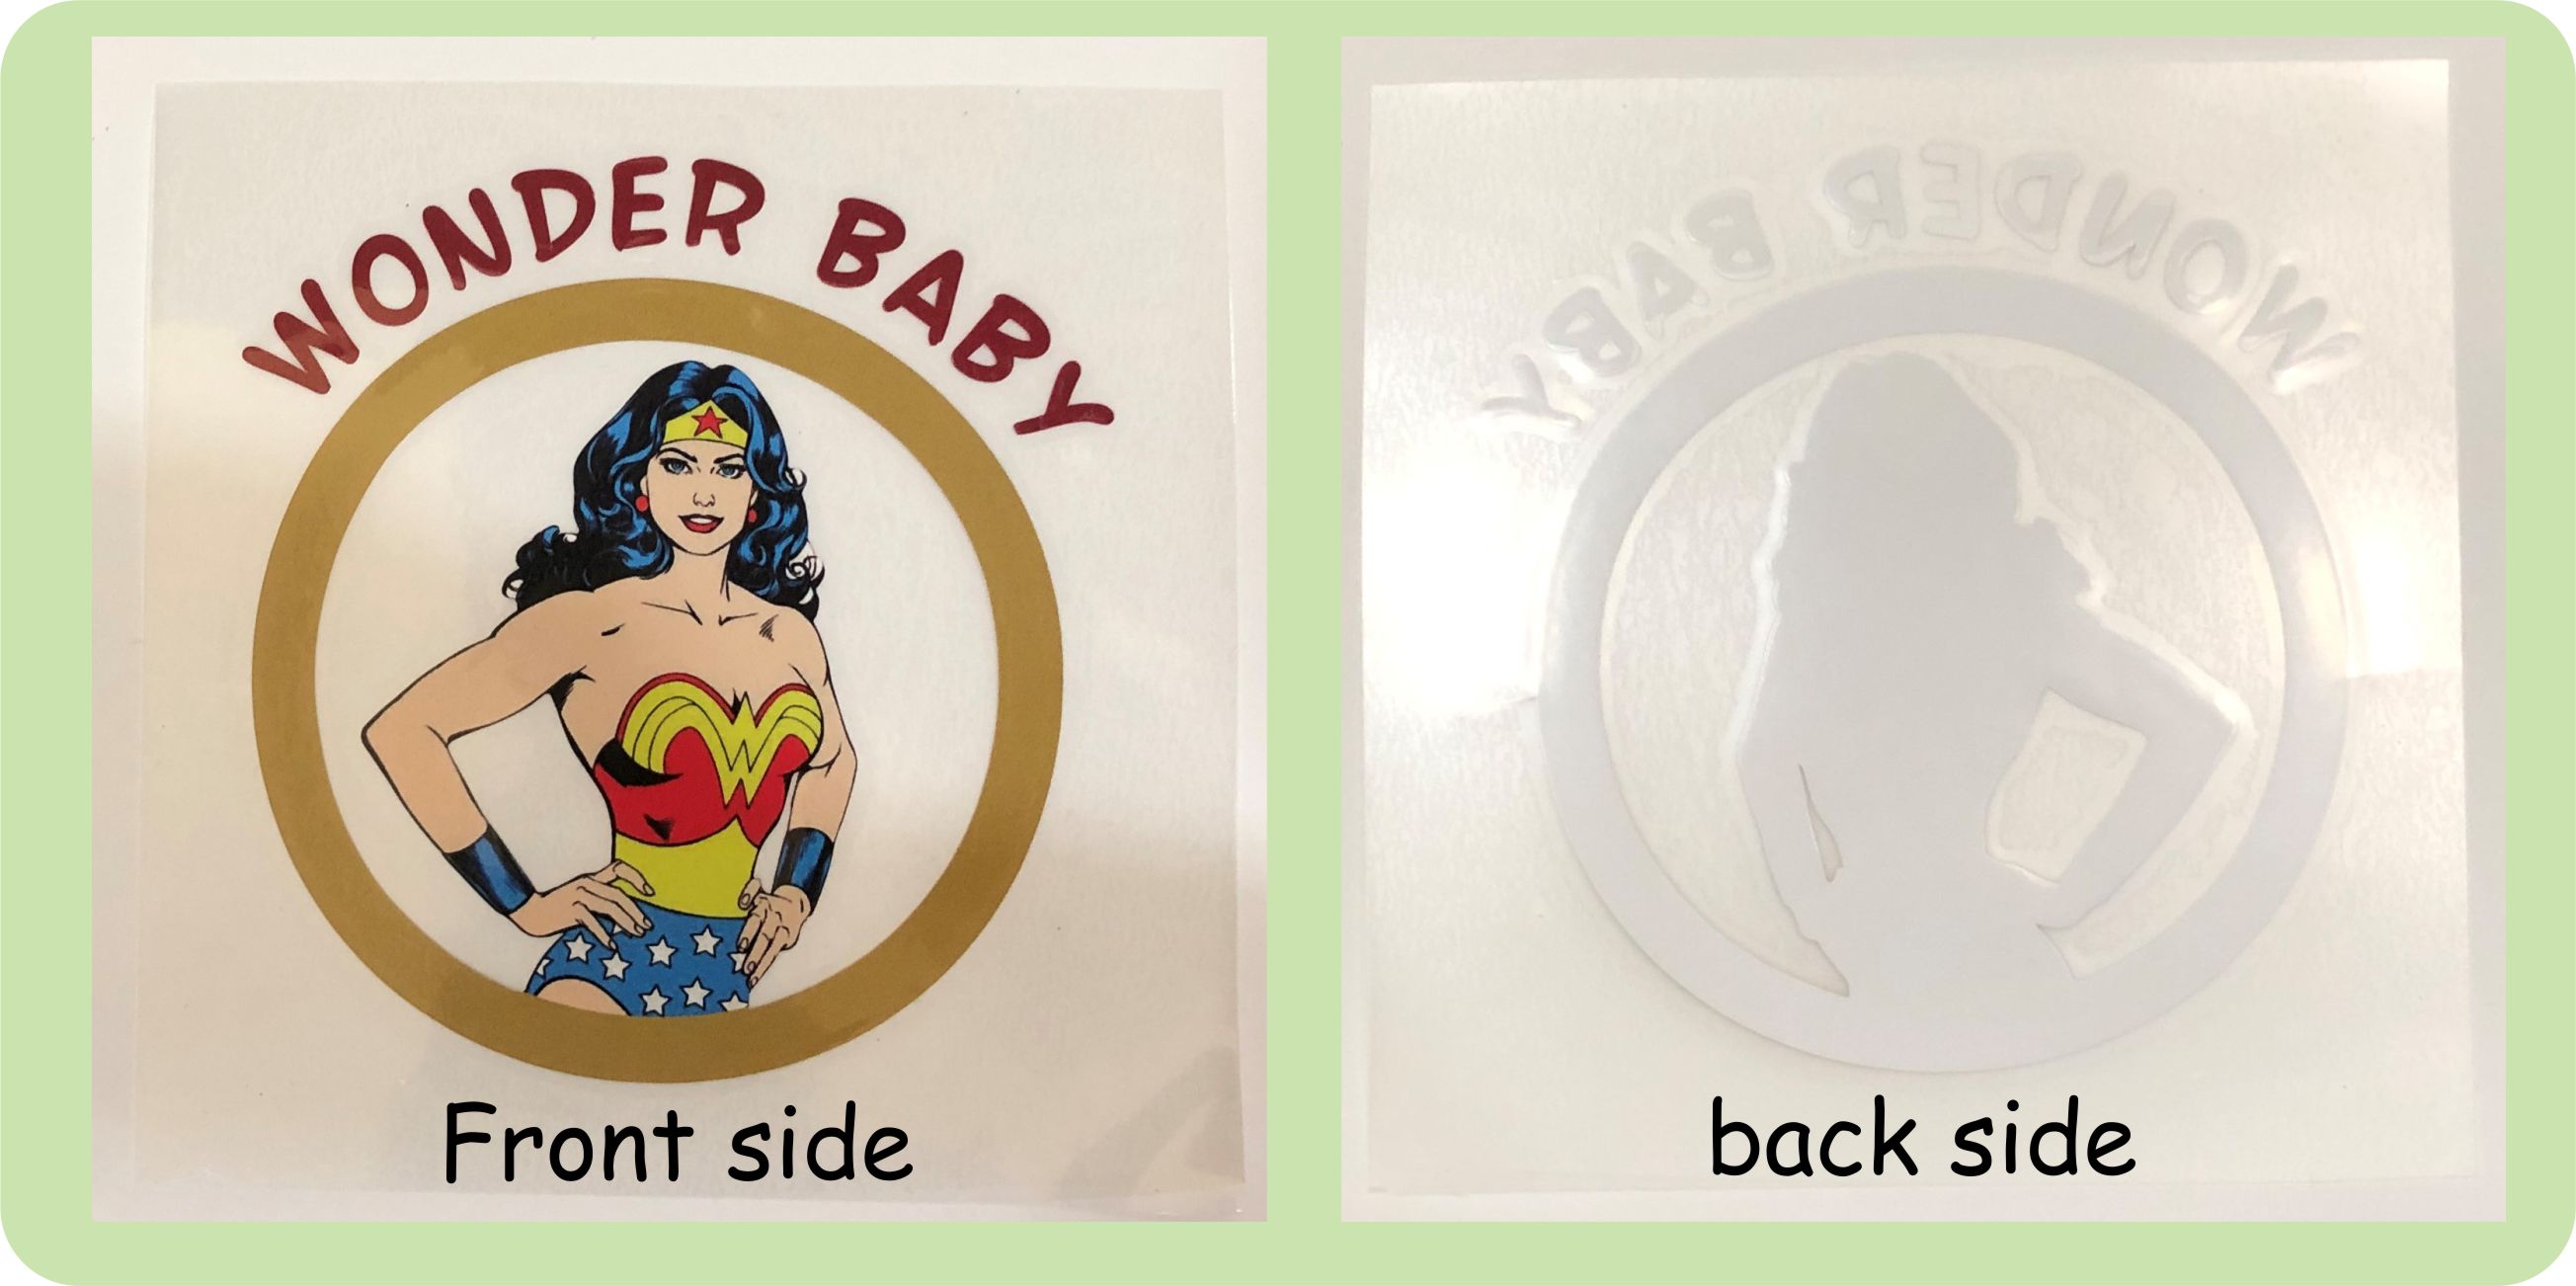
Step 2 – separate the plastic films. Start with the design face down, and at one corner. Yes it can be a little painful to get the films initially separated. I usually use a pocket knife to get it started.
Then slowly pull back. The vinyl is slightly bonded to the top film, but the bottom film is sticky. When the films are separated, we want all the vinyl on the sticky bottom.
But as we separate the films, some of the vinyl might want to stay with the top film. We will fix that with two methods.
Notice in the leftmost picture below, I have sharply bent back the plastic film. This really helps the vinyl stay with the sticky bottom.
In the middle picture, that didn’t work with the red letter you see. So in the right most picture, you see that I pushed the films back together, with my finger pressing down on that trouble letter.
Then I pull the films back apart, and then the letter stuck down as I wanted. Worst case, if a piece of vinyl gives trouble, move to a completely different edge and start from there. A different angle also usually fixes trouble spots.
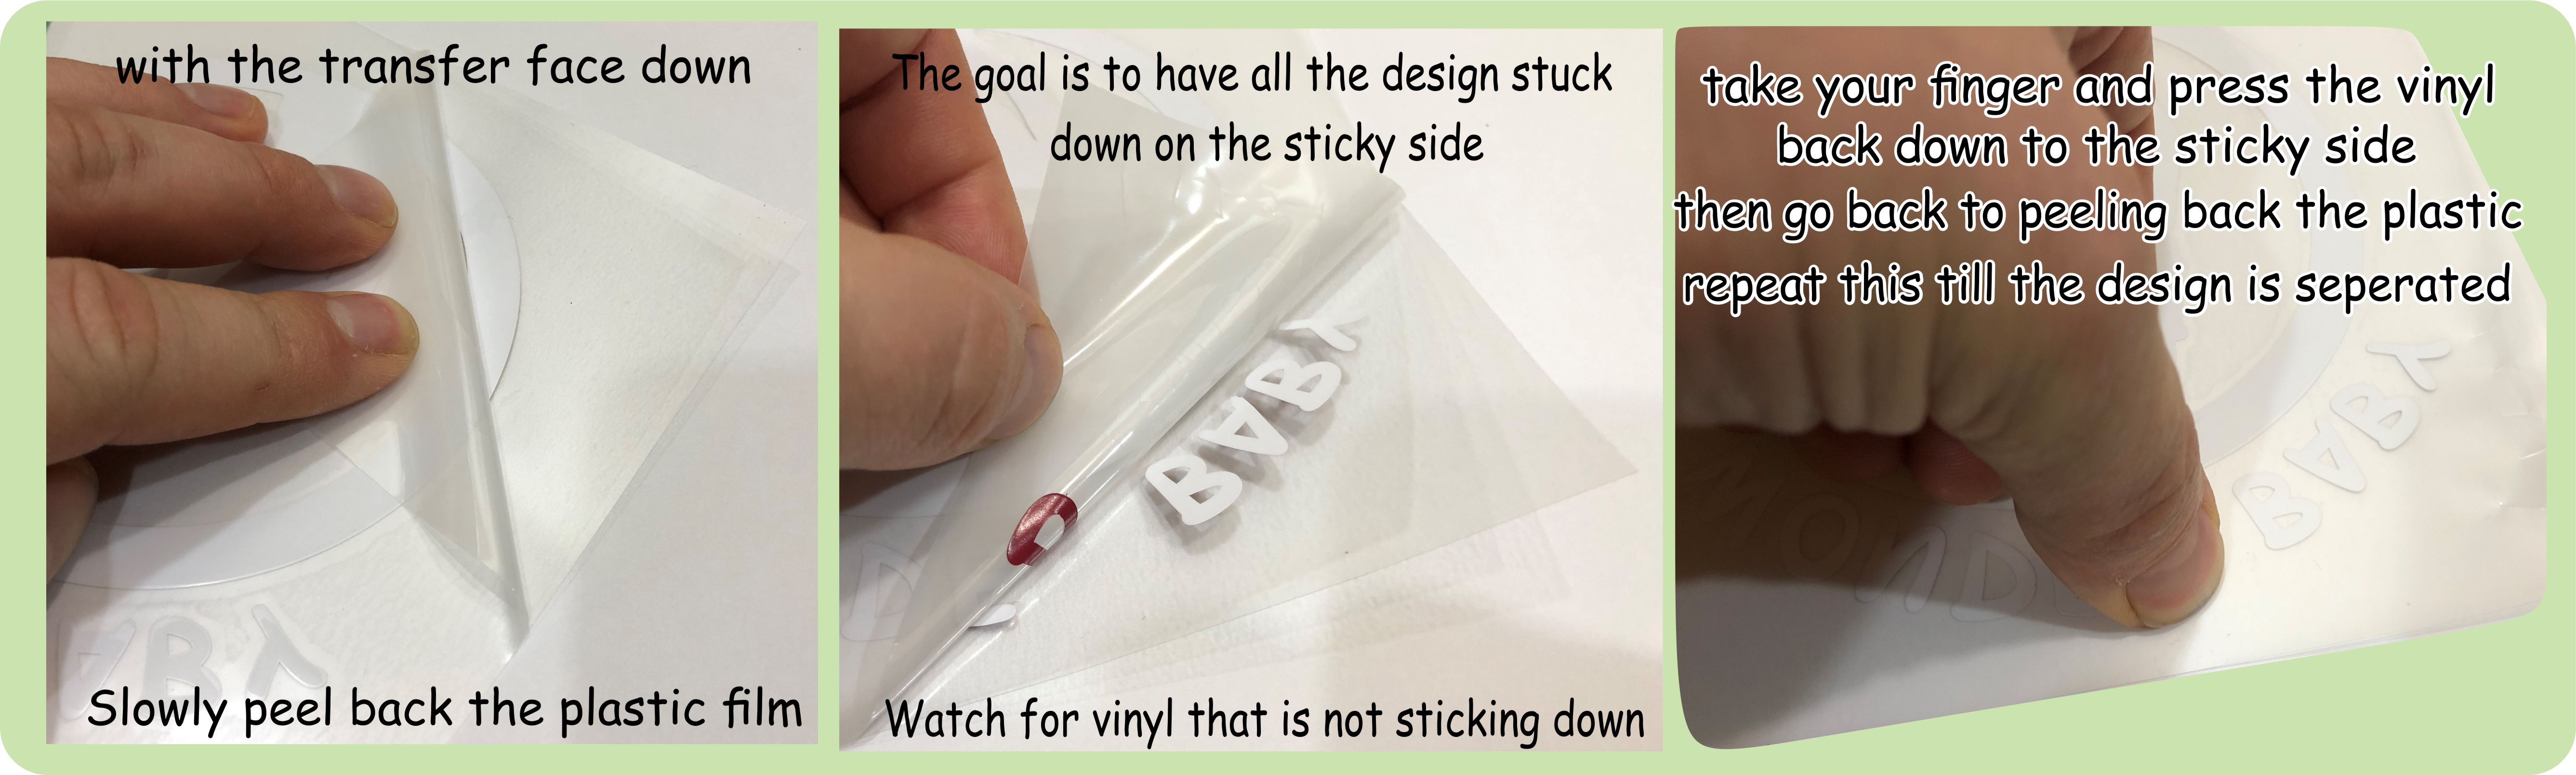 Separate the plastic films
Step 3 – center the transfer on the shirt or onsie.
 Center the transfer
At this point the design should be all on the sticky sided vinyl. Work in a clean area and protect the sticky side. The next step will be ironing this onto the clothing, and you don’t want to iron anything ‘extra’ into your shirt.
Step 4- iron the design onto the clothing. If you have a heat press, the recipe is 300 degrees Fahrenheit for 15 seconds at medium pressure. For your iron, Wool/Silk is perfect, Nylon will need a little more time, and Cotton a little less.
Don’t put water in the iron! You will just be using the iron for heat!
How much time? If you have a wool/silk setting Your iron should use about 20-25 seconds on each portion of the design with you pressing down and keeping the iron moving. As your iron probably can’t cover the entire design in on go, work a section, and then move to the next.
Keep the iron moving!
You want to melt the design into the shirt, but way to much temperature and way too much time will start to darken the design and blur it.
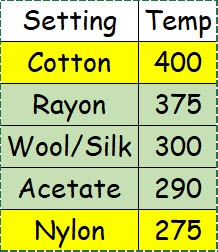 The correct setting on your iron
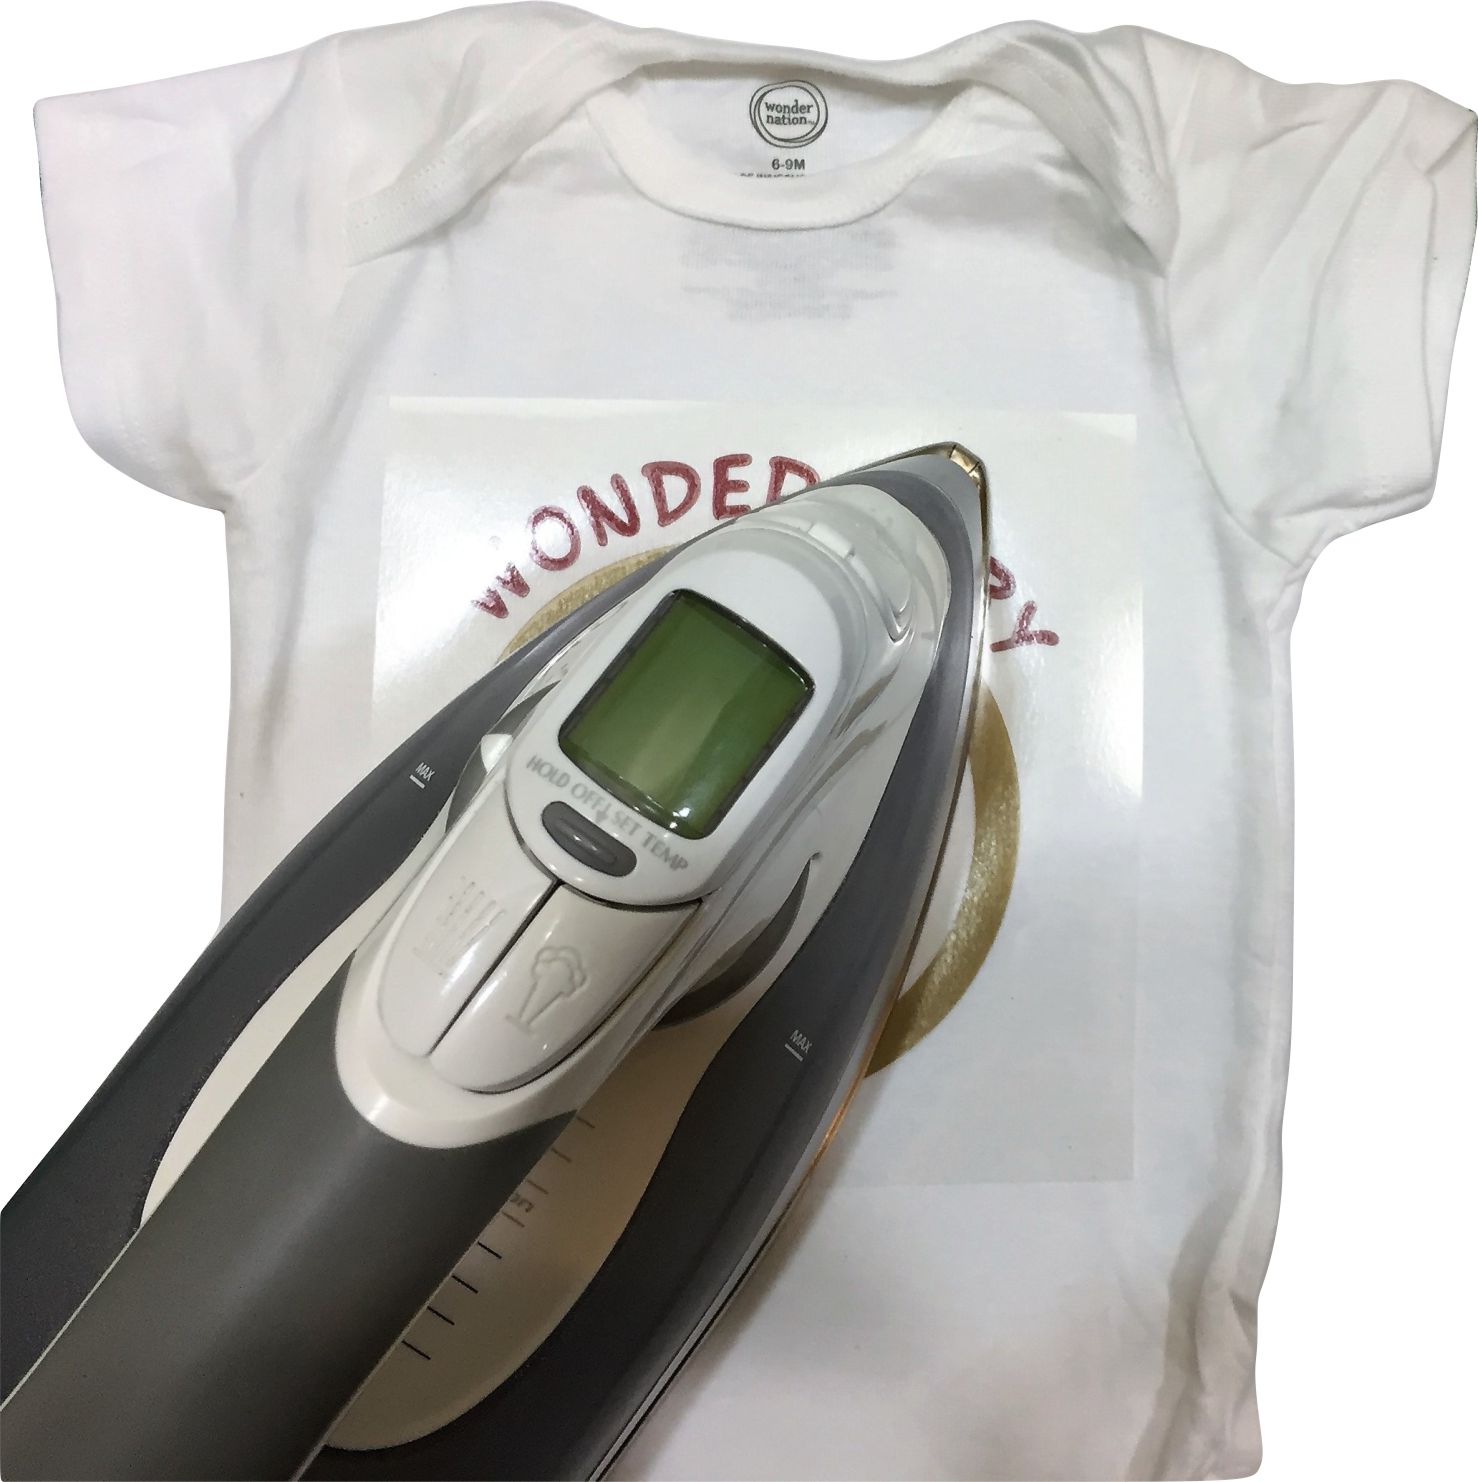 Iron the design onto the shirt
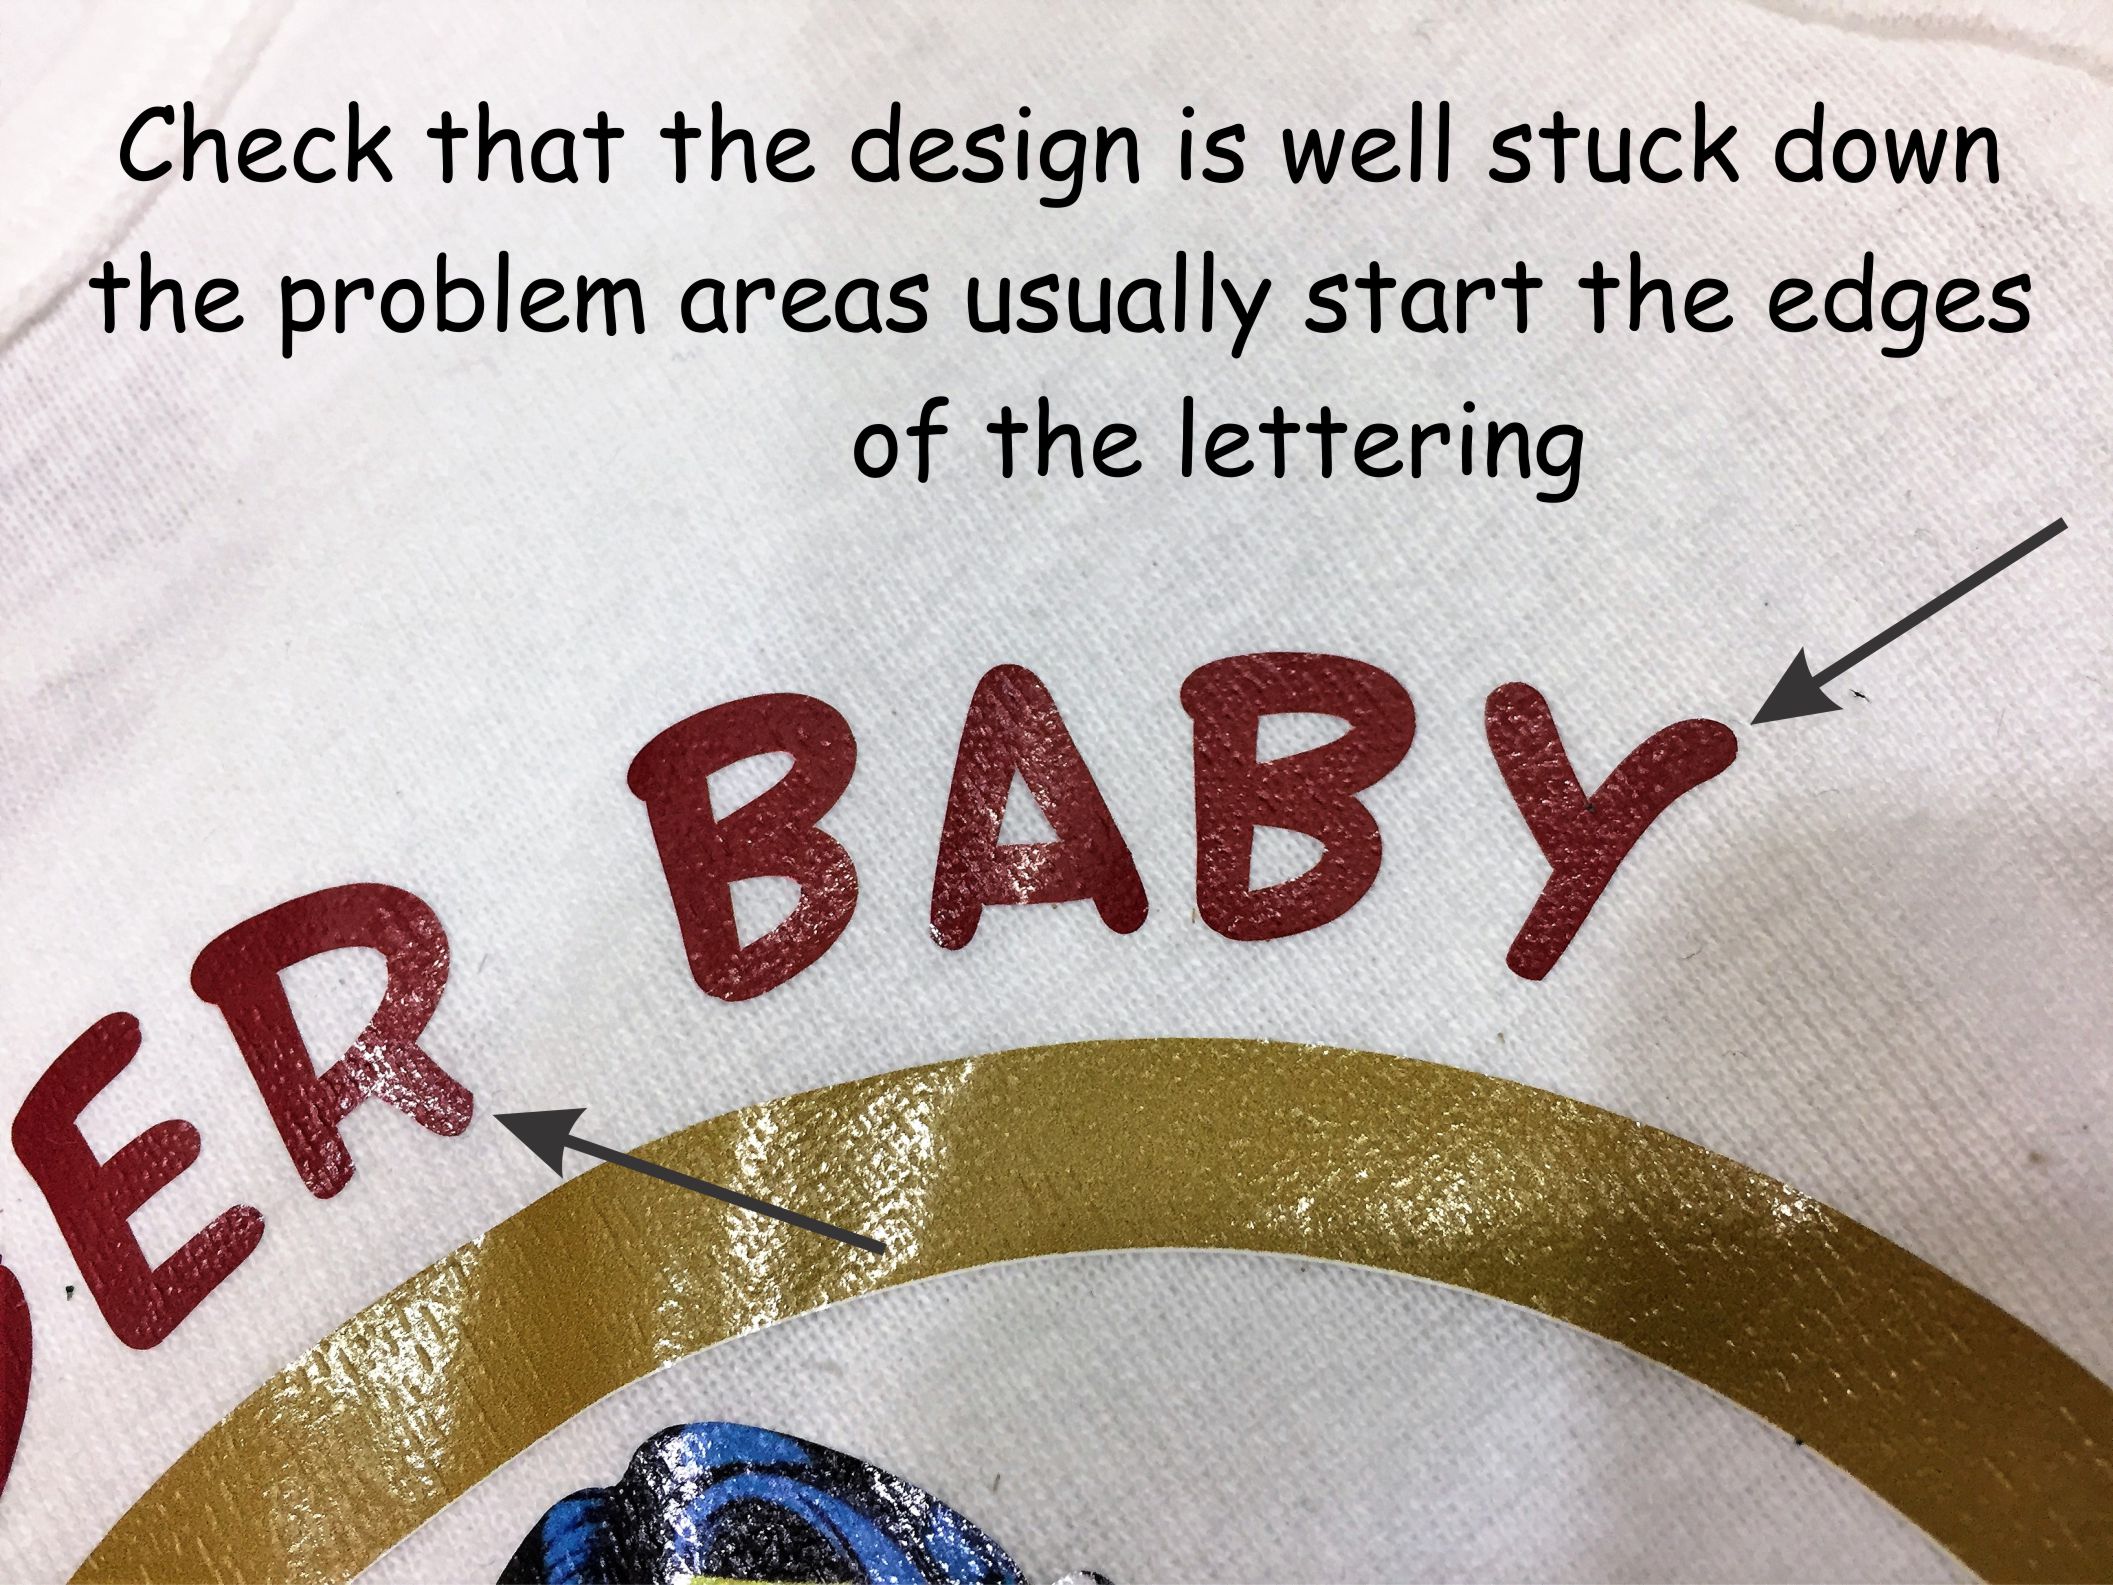
Step 5 – after you are done ironing, let the shirt cool down from super hot to very warm, and then slowly remove the top plastic starting from one corner or side.
Inspect the design for proper bonding. Trouble spots will be at the edges of lettering or thin designs as shown in the picture. If the design is not firmly bonded, put the plastic film back over the design and re-iron till it is.
You want the design to be like the image below – all of the design is firmly into the shirt.
As the design was ironed onto the shirt, it is a little sensitive to heat. The clothing will last longer if dried on low heat, and turned inside out. If the decal starts to age, it can be refreshed back to new just by putting the film back over the design and re-iron it!